blinkie

CraftyCrafter

Showing posts with label Neenah. Show all posts

Thursday, 24 April 2014

Copic Cardstcock Test For Aussies

 So I have been doing a little testing with my Copics on different cardstocks easily available in Australia. I did these when I first got my copics so my colouring is a smidge better now I hope lol. These are pretty messy though as I was more focused on blendability.
Quill White 200gsm
 Quill is my least favourite, sucking up a fair amount of ink and having the least smooth blend. I also found if you worked it too much it bled fairly easily.
Neenah Solar White
It's not perfect but Copics do blend on here fairly nicely and it can take a bit of ink. With all my samples I used a Marker Pad or Bleed Proof  Paper Pad underneath.
HP 200gsm
 This was surprising to me, I bought this to try some of the wet techniques from Tim Holtz' range of media. I wanted something other than manilla tags all the time. Anyway the copics blended fairly nicely on here with minimal bleeding. This cardstock is the whitest "white" that I tried as well(X-Press It also being very white), with neenaah being the creamiest.
I have also used Copic Xpress-it. I just don't have a comparison pic as I tend to hoard this for cards as it's the most expensive at $5.50 for 10 sheets($0.55 each).  I did buy the Neenah Solar white from the US, it was $5 for 25 sheets ( $0.20 each). Both Quill and HP can be found at Officeworks in Australia. HP Colour Laser Copy Paper was $25.50 for 250 sheets ( $0.10 each) and Quill was $12.72 for 100 sheets ($0.13 each).

As a side note I also have Promarkers and have used them on all these cs's. I have found surprisingly I like them best on the HP cardstock . . .
Happy Scrappin'
Purple

Saturday, 15 February 2014

Sweet Pea Stamps Be My Valentine With More MME State Of The Heart Gatefold Card

Hi again, this is another card I made for Valentines Day. Again I coloured my image after selecting the papers I would use to make them gel together a bit better and to make life easier for myself! I started by stamping Sweet Pea Stamps Be My Valentine by Elisabeth Bell in memento black ink onto Neenah solar white cardstock. Then I selected the papers I would use from My Mind's Eye State of the Heart paper kit and colour matched as best I could.
This is definitely not a  usual colour palette for me so it was good to be outside my comfort zone. I coloured the image with a mix of Copic and Promarkers. The reds are Promarkers, browns and skin Copic. I then saw some prefolded gatefold cards I had bought and decided it would be the perfect time to try one out :)  I grabbed my first two pieces of pp and cut them the same size, then inked around the edges lightly in fired brick distress ink and around the edges of the card base with antique linen.
With the third pp I had chosen I used the largest spellbinders Heart Circles die to cut a matte for my image and inked around it with fired brick. I then used a Lifestyle Crafts Rounded Nesting Squares to cut out my image. I however decided to alter the size a bit with my paper trimmer and tidied uup the corners with a corner rounder . . .
Now is where the fun began. I decided I wanted to mount the heart circle onto some plain brown cs to break up the colour scheme a bit . . . After searching and trialling a few, I even cut quite a few different ones I hated them all. So I took some white cs and die cut it and added some antique linen around the edges. I used foam tape behind the heart circle and image layers to give dimension.
I got to this point and just thought . . . it doesn't look finished! So I had a think about what I could add to the card to finish it off and after playing about with some ideas I decided on Lifestyle Crafts It Kit Corners, the filigree heart one. All die cutting was done using my Ebosser. I swear if I didn't have a best friend already my Ebosser would become my bestie lol.
I then stamped a secret sentiment under the half of the circle that I hadn't adhered to the card using stamps by Our Craft Lounge called Love Notes with Archival Jet Black ink. Finally I stamped a sentiment from Cloud Nines Weddings stamp set.
So that's it another Valentines card posted :) I finished off a couple I had posted last year with some sentiments in the middle so I had a few to offer people. I managed to sell a couple and add some $$ to my new machine fund because my ecraft is out of warranty and doing the same thing all my others did :( cutting through everything on setting 1 like it was butter.
Happy Valentine's Day and Happy Scrapin'
Purple

Sunday, 9 February 2014

Kissed By an Angel with KaiserCrafts Made With Love

It's the Purple teams turn over on Eclectic Ellapu and this weeks theme is use a die cut heart. Mine ended up getting very hidden so I added some extras lol. I used a whole bunch of die companies on here . . . Hope there is no rule against mixing them up! 
I started with KaiserCrafts Made With Love Collection (I snapped this up on clearance at a LSS), selecting the papers I wanted to use. I then did some colour matching with my Copics and Promarkers and stamped Connie Fongs Kissed By An Angel Sweet Pea stamp with Memento ink onto Neenah Solar White.
I then die cut the image and my first two layers using Spellbinders Ornate Artisan Tags and Accents. Now here is where I go into trouble as you will see in the pic. I hadn't actually crafted at home for a while and didn't realise my craft sheet wasn't totally clean :( As I edged my image with Squeezed Lemonade Distress Ink I swiped up some blue off my mat :( For the bottom layer I snipped off the long end pieces before I inked the edges as you can see in the pic. I used foam tape on under the image and double sided tape under the matting piece.
 Next I die cut Lifestyle Crafts Heart Insert surrounded by a Nesting Lace Heart die from red foil cs. I saved all the little hearts for other projects as well as adding some to this one. I had to use the metal shim in my Ebosser to get this die to cut through the thick card stock. I glued the heart down with Matte Accents.
Next I used a Sizzix Sizzlit die called Ribbon Insert. My cat loves Sizzlis, if she sees one around she thinks it's fair game and claws it! Good thing they still work with claw marks in them :)Very hard paper to take a pic of! I inked the edges of this piece with Milled Lavender. I used foam tape on this layer as well.
To hide my mess I grabbed some I Am Roses flowers and coloured them with distress stains in Milled Lavender, Wild Honey, Spun Sugar, Squeezed Lemonade and Barn door. I then spritzed them with homemade pearl mist (come on a girl's gotta have some sparkle, right?).
Next up I cut a piece of pp for the background and rounded the corners of the pp and the card base as well. I inked the edges of both with Milled Lavender and adhered the background with doublesided tape. I used matte accents to adhere my flowers and twizzles to the card as well as the cute lil hearts I saved from earlier.
Not totally sure how I feel about this one. I do know I think my colouring is coming along nicely :) Practice makes perfect right? Well till I kill it by swiping the wrong colours about the place! Flowers make everything better is becoming my motto I think . . .
Anyhow Happy Scrappin'
Purple

Saturday, 17 August 2013

Painting The Roses Red with My New Copics!

So I was looking into getting alcohol markers . I bought some Promarkers and I really liked them so I bought another set (vivid and set 1) . The only problem was I didn't have many blendable colours . Then I bought a set of 30 old Trias someone was selling. This gave me a few pastel colours and some skin colours and also 30 fine nibs that also work on the Promarkers . I really love the streakless colouring. I have faber castells and could never get them to not streak so don't know what I was doing wrong! Anyway to cut this long story short I frequent ebay quite a bit and came across a seller in France who was selling a complete set of  Ciaos and Wides with a couple of sketches thrown in. They are barely used (they said they did 2 pictures) and still nice and juicy. So with my heart in my chest and waiting til the last minute to bid I nabbed them for less than 1/3 of the rrp :) Bargain lol. Then for my birthday a friend bought me the case for them :) All my copics and promarkers fit in it nicely at this stage although I am not sure if I will keep all the wides. Will see how I feel a bit down the track.
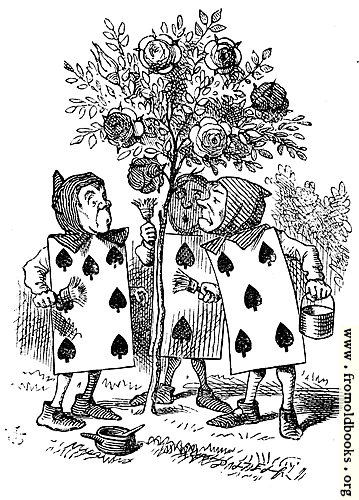
Anyway now that I am finished rambling about that I get to tell you that this weeks project for Eclectic Ellapu needs to contain playing cards :). So I scoured the net for an image I could use. I fell in love with one but thought $4 might be a lil much for a digi when you can get rubber for that price. So I kept looking. Originally I thought maybe I would do the Queen of Hearts from Alice in Wonderland but then I found some Free images at From Old Books. That links takes you directly to the page with the image I used but there are many many more :)
So now I have coloured this with a combination of copics and promarkers and am using an Xcut Ornate Frame die to cut it out in my Ebosser. Here is a list of colours I have used:
Roses, paintbrushes and Card 2; R27,  R29, E40, E41
Card 5; R59, RV69
Card 7; Promarkers Olive and Pear Green
Stockings;  E35, E33
Faces; E00, E01, E02, E93 (cheeks)
Tree; G99, G95, YG95
Grass and bush; YG63 YG67, Olive Green, G94, G28, YG91
Shadows on all cards; C5, C2, C0
Paint pots; C5, C3, Y21
Next I grabbed Cosmo Crickets 6"  Odds & Ends stack. I grabbed two co-ordinating pieces. The green stripey piece, the coloured image and the piece for iside the card were all cut using Xcuts Ornate Frames. I edged them with R29.
For the cream floral piece I used a Martha Stewart corner punch and my B000 for the edges. Argh my kitty is trying to help me type lol.
Next up I grabbed my Tim Holtz Tattered Banners Sizzix die to cut two banners the same size. I used white cs which I coloured with R29 to match the rest of the card.  The sentiments were printed out at the same time as the images. I cut around them then coloured them with B000, there was still some R29 on my fingers and it came off on the first one I coloured so I decided I best put some on the other one as well so they matched :). I added two layers of foam tape behind the middle of each banner after I taped the sentiments on.
For my base I used cream cs that I edged with R29 again. I used double sided tape to add my Cosmo Cricket papers and then a single layer of foam tape on my image. I then added the banners. I was in two minds as to whether or not to add flowers or not. But as you can see I have left it for now :)
Below are a couple of images I have coloured with my copics since I got them.
Not very good at hair yet that's why she isn't finished. I attempted hair on the second one as you can see :) also a mouth... Shoulda left it but live n learn hey?
The second picture here shows three different card stocks. Neenah Solar White and two I got from officeworks here in Australia. I have to say the cheaper two cardstocks performed way better than I thought they would. When I pull some more paper for my cupboard I will do a post on it and let you know the names of the brands :).
Thanks for Stopping by.
Happy Scrappin'
Purple

I am entering this at;
Simon Says Stamp - Die Cuts

Friday, 8 March 2013

A Special Delivery In Shades of Green


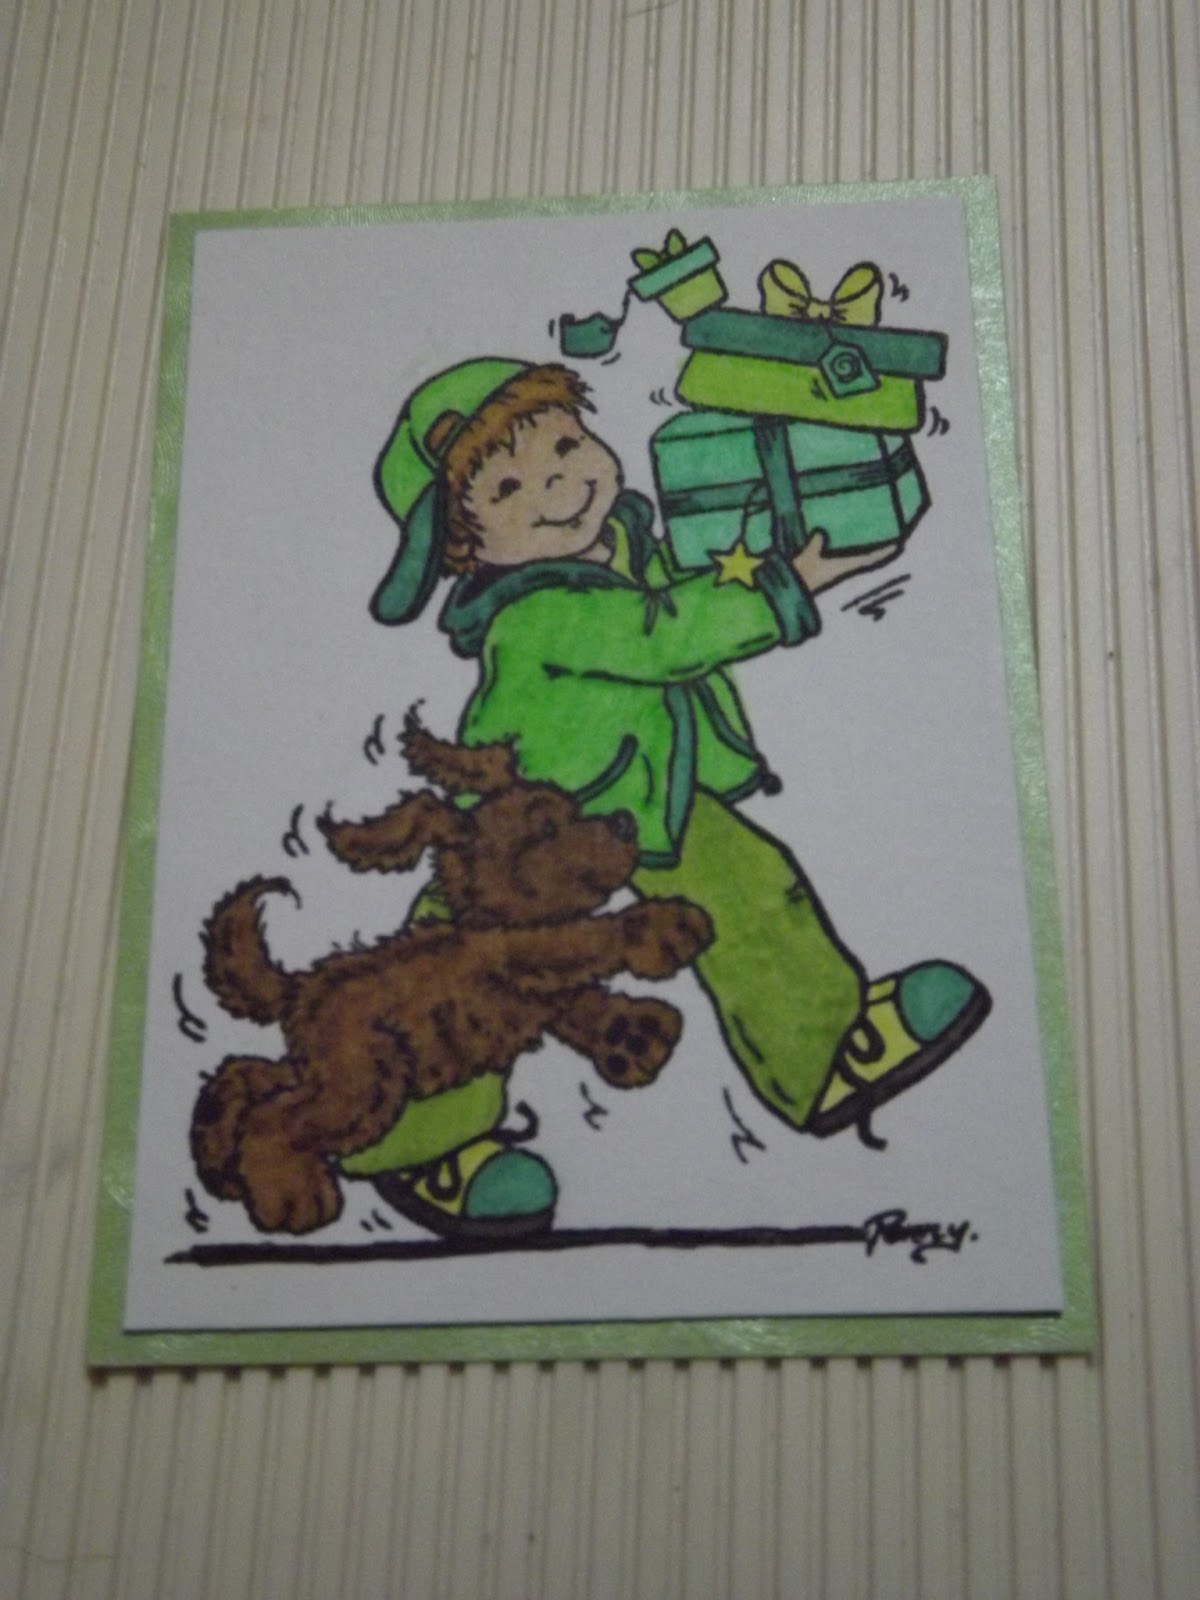
I started off with this cute Penny Johnson stamp called A Special Delivery which I stamped in Jet Black Archival on Neenah Solar White cs.
He is coloured using greens and a hint of yellow in there for good measure lol. The colours I used are Green Gold #268 for his hair, Light Yellow Glaze #104 for his shoes, Leafy Green #112 for his jacket and hat, Dark Phthalo Green #264 for his jacket trim, hat bill and shoes, Light Green #171 for the teeny bit of his shirt that is showing and May Green #170 for his pants. His face is Light Flesh #132. I used the same colours for the presents with some Light Phthalo Green #162 added in as well. The puppy is coloured in Raw Umber #180. I coloured the dog using short strokes to try and add some texture to the dog, didn't quite work out though lol. Colouring is a huge learning curve!
For this background I used my stampamajig to position the Tim Holtz Stampers Anonymous numbers stamp from the Fairytale Frenzy set. I used my markers again (was wishing I had taken my Big Brush markers to my friends that day lol) to colour the stamp, then misted with water before stamping the first one. As I was using the pitt artists pens on a pretty hot day the ink dried out pretty fast on the first one. Thank goodness for my stampamajig! Had to stamp it three times lol. But I learnt after the first one colour fast and mist extra!
I mounted each layer onto some green swirly and shimmery cs  picked up from a local cheapy shop. Then mounted the whole lot on a white cs card base slightly smaller than the green as I liked how it looked without an extra white border. I actually coloured him twice as the first time the green went a little onto the yellow star. So I was going to cut a star and foam tape it but silly me stamped on the original image :( lol.
Happy Scrappin'
Purple

Thursday, 26 January 2012

What Paper To Use For Big Brush Markers

Ok so I have recently bought the Faber Castell Pitt Artist Pen Big Brush Markers. I have been buying loads of different papers t try them on. Everything from manila to regular art journals, sketchbooks etc.

I tried whisper white Stampin' Up and it was ok but I was hoping I could find better. I have yet to try watercolour paper. When I find my pad I will. I bought two different manila's, a Kmart brand and then Avery manila folders in buff. The avery manila is pretty good, especially if you want to mute the colour tones a little. They come out almost pastely.

I bought a Reno Art sketchpad from a cheapy shop in sydney. It was the best of the bunch I had in my house when I bought my marker. Yes better than the whisper white. The paper is 140gsm so nice and thick and it takes the colour well. There is a little bleeding though.

So in my quest to find something easily accessible to me I went to a local shop that sells a fair bit of Monte Marte products. I actually went to get gesso brushes lol. I left them there for next time! What I did get was a Monte Marte sketchbook in A4 size. The papers are 150gsm almost cardstock like.

Ok so here is what I have discovered so far. Brilliant for colouring images. There is no bleeding. I need to work on my technique for laying colour down in big patches lol. You can make anything look better with mist! Blending is great for small sections but not as good if you try to do large sections at a time.

Neenah is supposed to be great but it is hard to source in Australia and post from the US is phenomenally expensive! So I have yet to try it. I do have a small pack in my SimonSaysStamp wishlist for next time I do an order. Another I would like to try is the Copic Xpress-it paper.

And here I am a couple days later and have bought a francheville sketchbook as well... It's pretty good for markers too. Not great for blending tho as its similar to watercolour and the ink sinks right in.

Tbh I really don't know what is best I am testing as I find. How do you colour with no streaks? I find small circles leave just as many line marks if not more lol...

Any tips please let me know :)
Thanks for reading!
Purple