blinkie

CraftyCrafter

Showing posts with label Butterfly. Show all posts

Friday, 5 February 2016

Watercolor For Cardmakers Intermediate Day One and Two - Wet On Wet Card and Varigated Wash

Here is the start of the cards I have made from class :) This one was made from well . . . rejects. I had been testing each of my paper to find one I could possibly do the wet on wet technique with before I got a pad of Arches, none of them worked properly but I was able to salvage some by cutting out the butterflies :)


I used Lifestyle Crafts nesting butterfly dies to trace to make the wet on wet butterflies, Spellbinders lace ovals and Archival ink that I stamped off with a KaiserCraft sentiment.
Purple

Monday, 1 February 2016

Watercolor For Cardmakers Intermediate Day One - Wet On Wet

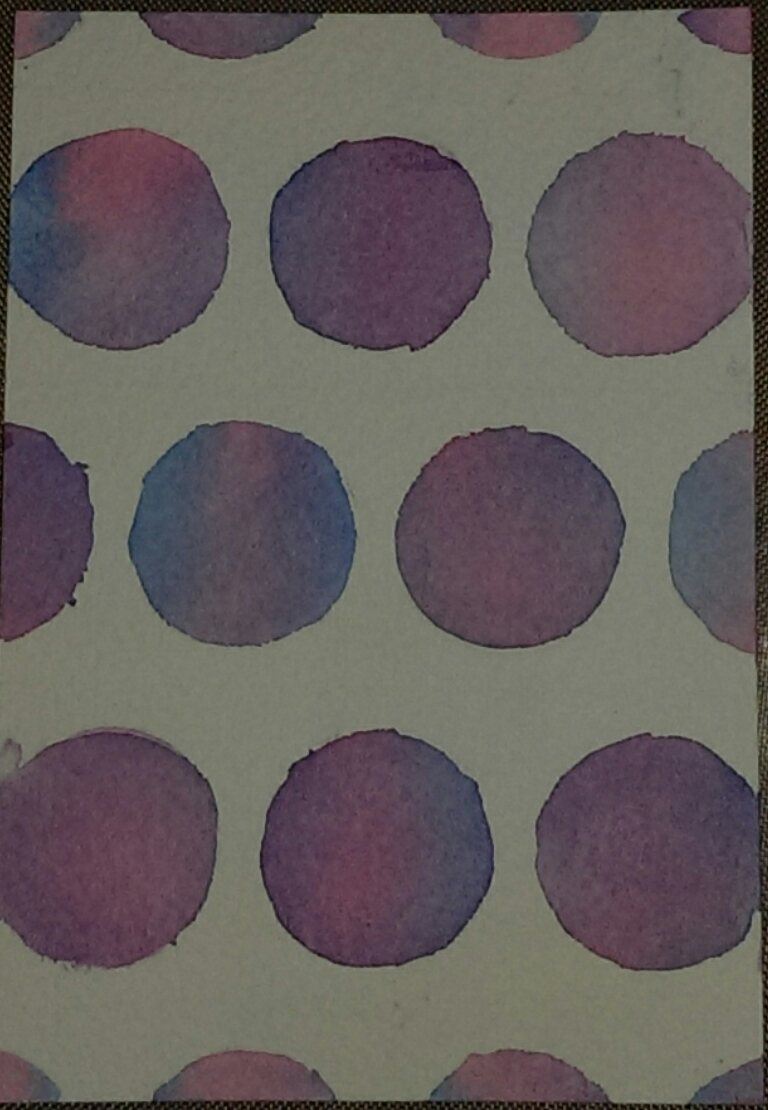
Hi, I struggled with not so good papers for this technique... I did make some butterflies but the papers I was testing on didn't work well for this technique so I redid when I managed to get my hands on some Arches Cold Pressed. As my arches is only a small pad and a precious commodity I did a half card front sized panel.


And some practice butterfly runs...


I actually salvaged some of the butterflies to make a card or two ;)
Purple

Tuesday, 19 August 2014

Stretch Your Stamps 2 Easy Watercolour Outline and Debossing


So we are at my second card from day 5 of Stretch Your Stamps 2 at Online Card Classes and I have chosen to use an Mpress stamp set, same flower again I know lol. It looks good what can I say?  I used Distress inks in Pine Needles and Aged Mahogany for the flower and Tumbled Glass for the border. I have used some Hemtique Twine and a Buttuerfly border punch I have for the itty butterflys. Really need to start writing on my dies what brand they are . . . I coloured the butterflys with Aged Mahogany so they tied in with the flower and sentiment from Whimsy Stamps.
Happy Scrappin'
Purple

Monday, 18 August 2014

Special 200th Blog Post Mini Easel Card With Drawer Featuring Candy Lane

So for my 200th blog post I thought I would have a break from SYS2 and post my Daughters 11th birthday card. As you can see it has a bit of a twist. It's an Easel box card so that you can put whatever you want in the little drawer that comes out. Here is a link to the youtube vid I watched to show me how to do this. I used two colours however because that's what miss 11 wanted lol.
I used KaiserCrafts Candly Lane 6" paper pad for this card 'cause if you can't tell . . . my daughters favourite colour is hot pink lol. I also used dies from Spellbinders and Lifestyle crafts as well as archival ink for the sentiment and prima flowers nd some resin floers from Ebay.
For the foam insode I just used some that came in something new once upon time. I have a box full of this stuff just for that purpose. She also got a ring and bracelet in this so I cut slots using my Tim Holtz Scissors and my Prima Knife.
Happy Scrappin'
Purple

Friday, 15 August 2014

Stretch Your Stamps 2 Word Art Stenciling

This is my second technique for day 3 of Stretch Your Stamps 2 at Online Card Classes and I have to say in trying to keep up with class I am a little bit too lazy to to attempt the other two right now, maybe at the end when I have more time lol. For this card I used a Heidi Swapp butterfly stencil with distress inks and Primas Notary stamp along with Versamark and Zing Aqua embossing Powder on a Fiskars Laughter Quote stamp for a pretty cool one layer card.
Happy Scrappin'
Purple

Monday, 26 May 2014

Distress Paints and Cabbage Roses CAS Style

Hiya Just a quick one today :D This is a card I made for someone who wanted some nice simple Thank You cards. The card started with me playing with the first set of Distress Paints when I got my hot li'l hand on them (the rest of the collection should be winging its way across the seas as I write this!) and doing some practicing on a craft tag. I used a Tim Holtz Stampers Anonymous flourish stamp all over the tag with Picket Fence Distress Paint. I had used the tag for something else and had about half left so I got the idea to use it up. I admit I have a box full of "Creative Play" type things I need to start using more and this project was perfect for one.
Something I don't do very often is go CAS, what can I say I like to add things lol. But all I had was half a tag and a vague idea. If you know me, you know I love butterflies, so out came some butterfly dies. I chose the smallest from Spellbinders Nested Butterflies Two and Lifestyle Crafts Nested Butterflies and cut a few from my tag.
I then grabbed Tim Holtz' Movers and Shapers Tickets die and what was left of my tag and cut the smallest ticket for my sentiment. For the background I used white cs and the Spellbinders M-Bossabilities Cabbage Roses. I also did something I haven't done before which is to stamp a split type sentiment. I stamped just a note on the front and then on the inside to say thank you with archival ink. I finished it off by adding a bunch of baby pearls.
Happy Scrappin'
Purple

Ps what a beautiful country I live in :)
Calalla NSW Australia

Sunday, 16 March 2014

A Little Gelato Love with Fleur Botanique

Hi everyone. It's that time again, time to post a new card for Eclectic Ellapu. The theme this week is Butterflys and Flowers. I got this stamp free with a magazine from England... So glad it was in my local newsagent! I had to have this gorgeous stamp. The magazine is Cardmaking and Papercraft and it's from the Fleur Botanique collection..
I coloured the background using gelatos like a watercolour. The flowers are done in Guava and Bubblegum for the pink and Lavender and Grape for the purple. The leaves are Pistachio, Green Tea and Lime and the background is Metallic Mint.
I used a spellbinders nested scallop die for the next layer, for the pp I used a lavender gelato wash to give it a hint of purple and then I cut a white square to mat it all on before adding it to my pink star dream card base.
I then stamped some butterflys in archival ink and water coloured them with the gelatos. I couldn't decide if I wanted to stamp them with black or coloured archival, so I did both and then chose the black ones :)

I took some white I Am Roses and coloured them with the gelatos to match the flowers in the background. The colours came out much darker on the flowers though lol. I misted them with homemade shimmer mist for some sparkle.
Finally I used a Tattered Banner by Tim Holtz to add my sentiment which was actually part of a journal block and coloured just the part I wanted with Black Soot Distress Marker. I added some Guava Gelato to the edges and smudged it with my finger.
So that's my card for this weeks challenge :) It's Mothers Day in may and so I am going to give this to my mum :) Her colours are red and aqua so I hope she likes this anyway, Haha!
Happy Scrappin'
Purple

Saturday, 12 October 2013

Creative Chemistry Monoprint and Brayering

Wowser it's hard work trying to get some of these finished off to upload to the gallery but anyhow here we go with techniques from days 2 and 3 :)
I like this one! Simple and pretty :)
Happy Scrappin'
Purple

Wednesday, 17 April 2013

Prickley Pear Funky Butterfly Cards

I have two cards to share today both in the same style.  One is coloured and one is black and white. Both use the Prickley Pear co-ordinating Butterfly die and stamp sets. I coloured the first one by using Faber-Castell Big Brush Markers on my Ranger craft mat and spritzing them with a little water to make pretty watercolours :) Both Cards have been stamped with Black Archival ink and have been cut to fit a standard card size envelope.
You achieve this look by first positioning your die on the folded edge of you card with a portion hanging off. It's best to use some low tack tape ( I use florist tape) to stop the die moving about. Position the card and die on the edge of you cutting plate so that only the portion you want cut is on the plate itself, use the fold as a guide line. I use more tape to hold it exactly in place. Run through your die cut machine ( I have a cuttlebug but it will work in any) and adhere your stamped butterfly using the opening as your guide and embellish to finish.

You can do this with any shaped die and once you get the hang of it it's a quick fun technique to make a card :) Let me know if you would like a video tutorial . . .
Happy Scrappin'
Purple

Monday, 25 March 2013

Pattern Play Day Three Using Antique Rose Papers

For day three of Pattern Play I decided to try out Kristina Werners tips. I chose a paper from the KaiserCraft Antique Rose collection and cut it into 2cm strips. I used an off cut from another card with some washi tape to make a straight edge to help me layout and adhere my strips of paper.
 Next I grabbed a Cuttlebug Cut and Emboss folder. I am not sure what it's called sorry :( but it makes some lovely labels. I grabbed a subtle pp from the antique rose pad to make my label. I tried using distress stain to highlight the raised edges but that didn't work very well. Later I used some snow cap paint dabber mixed with a little water on the raised edges. The sentiment is from Inkadinkados Chelsea Sentiments.
Next I decide it looked a little plain so I cut a butterfly from the same pp as the background with Tim Holtz's movers and shapers from Sizzix. I chose a piece that was mostly blue so I could bring that colour in a bit more instead of it just being a little bit on the edge. I added some orange bling to the centre with Matte Accents as my Multi-Medium Matte ran away lol. I felt it could do with that little bit extra . . .

I used a small strip of  foam tape to raise the butterfly off the label a little bit. I was very overwhelmed with how bold and bright this paper is, but I have to say I think I like how this card turned out :)
Happy Scrappin'
Purple

I am entering this at:
Challenges 4 Everybody - Anything Goes 
613 Avenue Create - Anything Goes
Make It Monday - Anything Goes 

Saturday, 23 March 2013

Clementine Pattern Play Day 1


Well I guess everyone knows by now how much I like to combine my challenges. This card rolls a few into one and includes the Pattern Play class I am doing at Online Card Classes. I started with this sketch from Freshly Made . . .
I started by picking my papers, I did this with two thoughts in mind, two green challenges, a monochromatic challenge and a friendship card all rolled into one. Anyway the papers I chose are from the Cosmo Cricket Clementine stack.


 I then used the Tim Holtz Butterflies On The Edge die on the pp with the leaf shapes. Then I trimmed it down to fit across the top of the card and taped it to the back of the darker green on green circle pp. I then used a strip of white cs as a colour break.
Next I cut the lightest paper with another movers and shapers die, I used the larger of the two tickets. I stamped inside the ticket with Mowed Lawn Distress ink with a Stampers Anonymous Tim Holtz sentiment with my new fiskars stamp press. Not sure what set as I grabbed a bunch of random stamps to craft at a friends lol. To make the words stand out a little more I embossed them with Ranger Superfine clear embossing powder.
I then grabbed a Hero Arts stamp that to stamp on the darker green pp. I used Pine Needles distress ink and embossed with the superfine again. I then taped the butterfly/darker paper onto my white card base. To add the ticket I used foam tape foe some dimension.
I thought it looked a little plain. So I decided to bling it up with some bling from the bottom of the stamp set. Everything is better with a lil bling!
If I was remaking this card I might have tried swapping the lighter herringbone  pp with the darker green circles. But at least I followed the rules for choosing paper :)
Happy Scrappin'
Purple

I am entering this at the following places:
Crafty Cardmakers - Friendship
Make My Monday - Monochrome
Die Cut Divas - Green

Sunday, 24 February 2013

Gel Medium + Glitter + Distress Stains = A Lot Of Fun!


Warning: Very Messy!


 I have a few techniques I want to try with Gel Medium. So I bought some Liquitex Gel Medium (my local spotlight just started carrying Liquitex!) and my first technique was with glitter. My friend walked into a thrift shop here and found a bunch of glossy photo paper someone had gotten rid of. I don't know why but I decided it would be perfect to try this on lol.


I taped the photo paper to my craft sheet with repositional tape and then taped the stencil in place with florist tape. I used a 12" Crafter's Workshop Daisy Cluster stencil used a blob of the gel medium. You can spread it with a craft trowel, an old credit card or any other scraper type thing you have. Make sure you get in all the small spaces and then remove stencil carefully and clean immediately with water., otherwise the gel stays there forever, then I sprinkled glitter all over the gel and set it aside to dry.


For the sentiment I used a KaiserCraft stencil I had gotten a long time ago called party time. This time I used regular card stock and repeated the steps above after die cutting a Lifestyle Crafts Nesting Oval to fit over the words.


 On another piece of photo paper I grabbed a bunch of colours of distress stains (from the new 12) and splattered them on the paper. I then used the movers and shapers butterflies as well as an ittty bitty Lifestyle Crafts Nesting Butterfly to die cut the splatter paper (I tried using normal paper but it was too washed out compared to the vibrant photo paper).


When the gel medium is dry I used a paintbrush to remove the excess glitter (if you don't do this your stains end up caked with glitter! (you will still have some but not as much as if you use the brush). At this point you have to work quickly because the photo paper absorbs the colour really fast so if you want the colours to blend a bit I recommend starting in one spot and doing adjacent gaps. I used distress stains to add the colour by gently dabbing over the area I wanted a particular colour.  Once I had coloured it all I began to dry it. It looks like a mess but once dry you can dampen some paper towel and remove the excess stain from the glitter.


I used a plain white cs base to best show off the colours and adhered the flowered photo paper with double sided tape. The butterflies are glued down with glossy accents and the oval with a combo of foam tape and glossy to help it adhere to the glitter. I  have to say the colours are even more vibrant in real life lol. Hard to get accurate pictures of it with all the sparkling! What little girl wouldn't love this :)
Happy Scrappin'
Purple

I am entering this at:
Crafting By Designs - Anything Goes
Love to Create Challenge - All That Glitters
One Stop Craft Challenge - For The Kids
Inspire Me Fridays - Anything Goes
Make It Monday - Anything Goes

Wednesday, 6 February 2013

Butterfly Birthday Card


Today I am sharing the purple card I talked about in a previous post. This was nice and easy to make. I used Distress Stains on lightly misted watercolour paper. I started with Seedless Preserves, then Dusty Concord followed by Shaded Lilac. I made sure to overlap each colour a little bit. I laid down a good amount of each colour and then blended with my finger from darkest to lighest and then from lightest to darkest.

Once dried with the heat tool I flicked water over the top, waited around 10-15 seconds and then mopped up the excess water with paper towel before drying with a heat tool. I coloured a small scrap of paper in the same colours and used a Carl punch to cut a butterfly.


I stamped my sentiment with a Hero Arts stamp and used silver embossing powder. When I heated the embossing powder it melted into the back ground :S. I don't know if it was becaue of the watercolour paper or if it was because they powder was some old stuff my mum gave me lol. I cut a V at the end and then using another Carl punch I cut some mini suns out, as you can see I cut too close to the edge with one :(


I used foam squares to adhere the strip to my white card base and Glossy Accents to adhere the butterfly. I then used a Viva Decor Pearl Pen in Silver to decorate the card and butterfly with some dots.


Well this has to be the cleanest and simplest card I have made :) I really love this one lol.
Thanks for stopping by.
Happy Scrappin'
Purple

I am sharing this on:
Simon Says Stamp
Make It Monday
Joyful Stamper - Inspire Me Fridays
One Stop Craft Challenge

Sunday, 18 March 2012

Spellbinders Butterfly Cards

I have a pile of cs offcuts my sister got me from a recycle shop. They are nice and thick and semi gloss on one side. I love using them with my Spellbinders and Lifestyle Crafts dies. They make great shaped cards as the cs is thick enough it will emboss the edges as it runs through as well.

Recently I was at my friends house and wanted to show her a couple of techniques to make cards with the thin dies. I showed her two ways. My first card was made by cutting two of the one shape and then about 2cm from the top of the back one I scored a line. In this small 2cm section is the only place you add adhesive and then you stick the top piece over that and line up your shapes. This allows your card to flip open.


The card was made with the Fiskars It's Your Day rubber cling stamp set. I used the flower stamps and Barn Door distress ink and stamped off on a scrap before stamping on my card. I then stamped my images and fussy cut them. The sentiment is stamped onto a lifestyle crafts labels die. The images were adhered with foam tape for dimension.

For the next card I pre-folded the cardstock and carefully laid the die on cs making sure the folded section was just inside the top of the wings. I have also made a card with this die as a side opening card instead of a top opening card. You can just see in the pic that the top of the wings are flat from the folds. 


I stamped the back of the card in milled lavender distress stain with a recollections butterfly stamp. I then took the same stamp and stamped again on white cs and fussy cut around it. I used the medium spellbinders butterfly to cut a piece of Prima pp. The sentiment is from Fiskars Butterfly Magic. The rose is from I Am Roses and inked with milled lavender distress stain and then sprayed with homemade shimmer mist.

I really love shaped cards. I have recently started seeing what images I can use with my ecraft to make them. My last blog was a doily card I made with the ecraft :)
Happy Scrappin'
Purple

This has been entered into the simon says stamps and show challenge

Sunday, 5 February 2012

Beaded Flower Spray


Ok so as you can see I have been having fun with lately! I was following links and came across one from Wild Orchid Crafts for Floral Bead Sprays. So I decided to give it  a go :) With my own flavour  added of course lol.

I gathered some beads, iamroses flowers in various sizes (all white) and beading wire and set  off on an adventure lol. I, loving butterfly's, had decided this time I must have a butterfly. I resisted the urge on my previous bead sprays so now was the time! I also decided my favourite colour, purple, would be my colour of choice.


Supplies in hand and working on my twist, the first things I grabbed were the butterfly and a rose bud. I wanted my rose bud to be the top of my spray so had to work out how to incorporate the butterfly and rose in reverse order to the video instructions.

I started with my butterfly bead as per the video instructions for beads but only gave a little twist to the wires underneath. I then stuck the long stem from my rosebud through the butterfly and incorporated it into the twisting wires.


I then made  four more bead/flower  combos one bead and flower on each. However after  I twisted  it all together it looked wrong to me lol.  I grabbed two more  itty roses and twisted them onto the two stems that felt too long and bare lol...

I coloured my flowers using dusty concord distress stain on the tips and then spraying with home made pearl mist.

My 8 yr old daughter took some pics for me :) I will add  one that  shows the whole thing when my camera batteries charge :)
Happy Scrappin'
Purple

Pic  showing  the whole spray

Friday, 27 January 2012

Girls Birthday Card with KaiserCraft Candy Lane


I hope you like pink lol. My daughters fave colour is pink. We are going to her friends birthday tomorrow and   my 8 year old dd wanted to make her a card just from her :). So I was thinking the Authentique Uncommon pad. My dd saw the Kaiser Candy Lane and we were off and running lol.

We used the largest Lifestyle Crafts Blossom die to cut the card base. As you can see in the pic we folded the card base and hung a petal over the edge of the fold to create and opening card. Around this dd blended Worn Lipstick Distress Ink.

She then chose the orange with pink foil paper for the next layer cut with the next size down Blossom die. On top of this we layered another pp with cupcakes and cherries on it. Out of the teapot pp we used a punch to cut some butterflies and stuck them around the outside of the circle with matte accents.

With a green flowered pp we cut a small circle and she Chose the Happy Birthday sticker to go on top. The sticker in the middle of the middle butterfly was originally on the circle but it fell off and got lost for a bit so dd decided on some pink hearts instead :) (I found it and stuck it in the middle of the pink butterfly)

We put the circle on the card to see how it looked and didn't like it. We cut a plain circle and the butterfly circle from Spellbinders. Of course after we embossed the butterflies with the tan mat dd had to have the butterfly circle as her mat. She inked the edges with more worn lipstick and then stuck the pp circle on top. She then used some foam tape to lift it off the page a little and front of card was done :)


A coordinating stack, a few stickers and dies make for a quick and easy card :). Not bad for an 8 yr old at all...
Thanks for stopping by.
Happy Scrappin'
Purple
PS here are a few pics dd took :)