blinkie

CraftyCrafter

Showing posts with label watercolour. Show all posts

Thursday, 4 February 2016

Watercolor For Cardmakers Intermediate Day 5 - Lesson 4

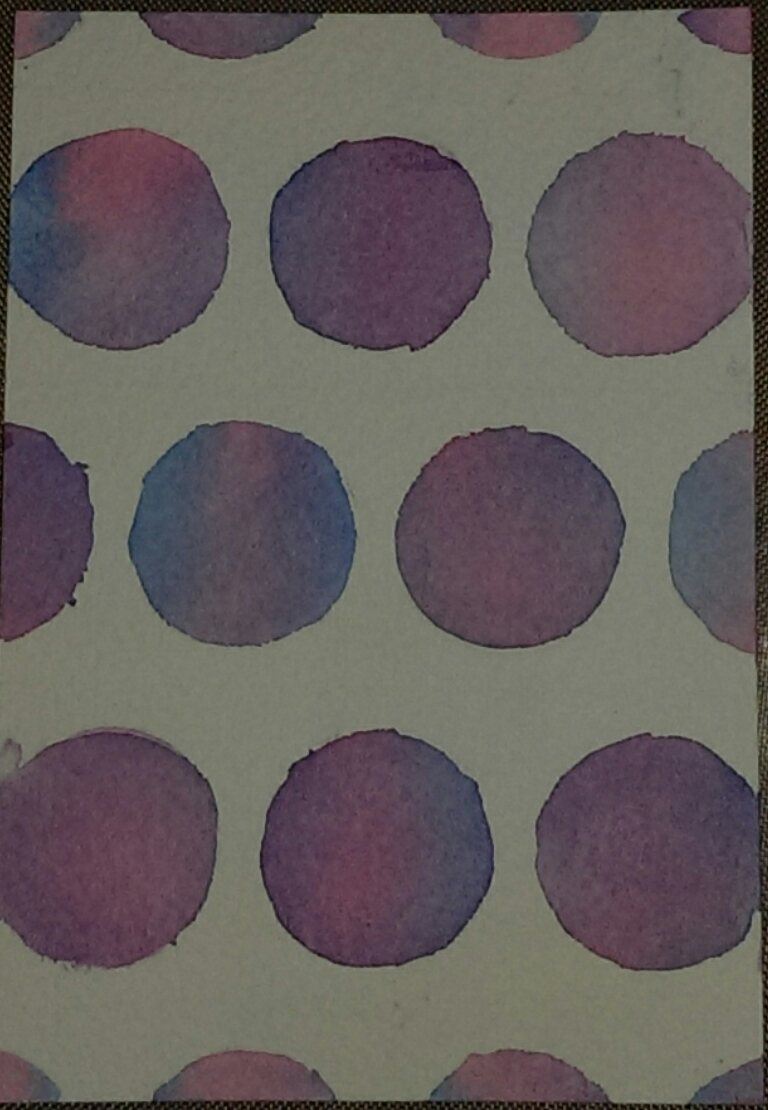
For this painting I've used Monte Marte 300gsm paper. I was quite surprised how well this turned out on the cheaper paper. I was able to lift colours with no problems like I've had on some other papers. This was my first attempt so wanted to try on something other than my expensive papers to start lol.


I have also used Windsor & Newton Cotman pans, with Plaid One Stroke and Semco brushes.
Purple

Watercolor For Cardmakers Intermediate Day 3 - Negative Painting Take 2

I tried this technique again using Semco paper, the first layer of colour faded out a lot, very muted colours. I did a quick test on the back and they didn't fade quite as much but still were not very vibrant. I also used a finer brush this time for a little more detail!


I used Windsor & Newton Cotman Watercolours, Plaid One Stroke Brushes and Semco brushes with a Fiskars Creepy Crawly stamp (that's not a creepy crawly lol).
Purple

Watercolor For Cardmakers Intermediate Day 2 - Wet on Dry Roses Take 2

I revisited this technique as I finally got a block of Saunders Waterford paper, not the same hot pressed as used in class. I am however a lot happier with how this one turned out :) Layer one.


Layer Two.


I used Royal Langnickel tubes, Plaid One Stroke Brushes and Saunders Waterford Cold pressed paper. I think this one is an improvement on my first few goes and the paper is playing a big part!
Purple

Monday, 1 February 2016

Watercolor For Cardmakers Intermediate Day One - Wet On Wet

Hi, I struggled with not so good papers for this technique... I did make some butterflies but the papers I was testing on didn't work well for this technique so I redid when I managed to get my hands on some Arches Cold Pressed. As my arches is only a small pad and a precious commodity I did a half card front sized panel.


And some practice butterfly runs...


I actually salvaged some of the butterflies to make a card or two ;)
Purple

Thursday, 21 August 2014

Stetch Your Stamps 2 Watercolour Stamping

My last card for day 8 for Stretch Your Stamps 2 at Online Card Classes and then I best get hopping on projects for the last three days haha . . . I used an itty petal stamp from the See Dee's stamp set and Fired Brick Distress Ink as well as Archival ink for the sentiment from Mpress. This is a super super quick card to make if you're in a hurry and you can cheat and just use a heart stamp if you want lol, I was tempted!
Happy Scrappin'
Purple

Tuesday, 19 August 2014

Stretch Your Stamps 2 Easy Watercolour Outline and Debossing


So we are at my second card from day 5 of Stretch Your Stamps 2 at Online Card Classes and I have chosen to use an Mpress stamp set, same flower again I know lol. It looks good what can I say?  I used Distress inks in Pine Needles and Aged Mahogany for the flower and Tumbled Glass for the border. I have used some Hemtique Twine and a Buttuerfly border punch I have for the itty butterflys. Really need to start writing on my dies what brand they are . . . I coloured the butterflys with Aged Mahogany so they tied in with the flower and sentiment from Whimsy Stamps.
Happy Scrappin'
Purple

Tuesday, 12 August 2014

Stretch Your Stamps 2 Ombre Effects


Onto day 2 of Stretch Your Stamps 2 at Online Card Classes and today we are doing a little ombre. I used watercolour for this but you can use any colour medium. I used Windsor & Newton Cotman watercolours in turquoise. The background stamp is from Fiskars, white embossing powder from Hero Arts, a Spellbinders die cut in my Ebosser and the sentiment is from Kaisercraft.
Happy Scrappin'
Purple


Stretch Your Stamps 2 Faux Watercolour Stamping

Another card from day 1 of Stretch Your Stamps 2 at Online Card Classes. I used Stampin' Ups Floral background stamp along with some ink spots I have from years ago, older colours. I used spellbinders and Hero Arts dies in my Ebosser and the sentiment is from whimsy stamps.
Happy Scrappin'
Purple

Monday, 11 August 2014

Stretch Your Stamps 2 Multi Layer Emboss Resist Part 3 Bonus

I couldn't waste this lovely piece I had left over from Stretch You Stamps 2 over at Online Card Classes so I decided to turn it into a card too. I added some Prima flowers and a bling brad to give the card a lift. The cardstock I chose for the card base fits right in between the orange and yellow mixing :)
Happy Scrappin'
Purple

Stretch Your Stamps 2 Multi Layer Emboss Resist Part 2

Hiya, I am doing Stretch Your Stamps 2 over at Online Card Classes, it's running right now if you want to join in. The beauty of these clsses though is that you can do them whenever you want :) This card uses all the same products as the last one so I won't repost them here. The only difference is the die is from mpress and I've added glossy accents over the top and scattered some sequins about the place lol
Happy Scrappin'
Purple

Sunday, 10 August 2014

Stretch Your Stamps 2 Multi Layer Emboss Resist Part 1

Hi, well I am really into Online Card Classes right now and am currently doing Stretch Your Stamps 2. This is my first card for day 1. Yeah I'm a bit slack on the  posting front but get ready for a tonne of posts! lol.

I used Hero Arts Seafoam embossing powder, Windsor & Newton Cotman watercolours, watercolour paper, the background stamp and the letters for "to you" are from Fiskars stamp sets and the die was a freebie from a magazine :) Free stuff is good!
Happy Scrappin'
Purple

Friday, 1 August 2014

Watercolour Daisy Thanks


Hi Everyone, this week at Eclectic Ellapu I chose watercolour for the theme because I am doing a class at Online Card Classes. I bought a bunch more last weekend because they had $5 off every class except for the new one coming up. If you haven't guess this is the class I am doing, Watercolour for card makers, lol.

I used Windsor & Newton Cotman Water watercolours in a 45 pan set that I have with Stampendous Daisy Thanks clear stamps that I have stamped in Stazon jet black as my archival has grown legs and run for the hills... For some reason my Stazon had dried out something fierce and I had to reink it twice to get it wo work . . . For my first attempt at this technique it didn't turn out too bad lol.
Thanks for stopping by,
Happy Scrappin'
Purple

Sunday, 27 July 2014

Hero Arts Watercolor Petals With Distress Markers


Hiya, I am doing classes at Online Card classes atm and one is Water Color For Card Makers, that link will take you to the main page. If you are interested in their classes right this very minute they have $5 off til the end of the weekend in the US. I bought a whole bunch lol.

For this card I used the Hero Arts Watercolor Petals with Distress Markers in Aged Mahogany, Victorian Velvet, Spiced Marmalade, peeled paint and I think Pine Needles. I created the border after I stamped (the opposite of what I was supposed to do and not with the right technique as I didn't have what I needed on hand) with some leftover Windsor $ Newton Cotman watercolours. The sentiments are from different stamp sets and when I find them I will let you know, they are stamped with stazon.
Happy Scrappin'
Purple

Saturday, 26 April 2014

Sweet Treats Gate Fold Flip Card with A Little Whimsy


This time at Eclectic Ellapu the challenge is Birthday. I made this card for little miss's 10th birthday. I used KaiserCrafts Sweet Treats stack for all the papers. The card is a Gate Fold with a flip panel and a pocket.
 I started with a piece of A4 white cardstock. I used my Martha Stewart Scoreboard to work out where my folds needed to be and then cut the two unneeded portions off with scissors. I inked around all the edges inside and out with picked raspberries distress ink.
 I then chose two coordinating papers and cut panels for the card and inked around them as well.
 I coloured this whimsy stamp with watercolour but I forget which medium lol, it was a freebie from a magazine and is slightly smaller than the rubber mount version. I used my Lifestyle Crafts Nesting Circles and then from the same paper I used for the inside panels I cut a Spellbinders Butterfly Circle, again inking the edges with picked raspberries.
 Front panels before the image is added.
 I cut some tattered banners and used my blending tool to add some picked raspberries. I then stamped in picked raspberries as well.
 This is the flip panel before you lift it stamped with carious sentiments.
 The open flip panel with a more stamping and a quickly put together pocket for some money.
All finished with the Image and sentiments added with foam tape. I am thinking I used a combination of Derwent Inktense and Watercolour pencils but don't quote me!
Happy Scrappin'
Purple

Sunday, 16 March 2014

A Little Gelato Love with Fleur Botanique

Hi everyone. It's that time again, time to post a new card for Eclectic Ellapu. The theme this week is Butterflys and Flowers. I got this stamp free with a magazine from England... So glad it was in my local newsagent! I had to have this gorgeous stamp. The magazine is Cardmaking and Papercraft and it's from the Fleur Botanique collection..
I coloured the background using gelatos like a watercolour. The flowers are done in Guava and Bubblegum for the pink and Lavender and Grape for the purple. The leaves are Pistachio, Green Tea and Lime and the background is Metallic Mint.
I used a spellbinders nested scallop die for the next layer, for the pp I used a lavender gelato wash to give it a hint of purple and then I cut a white square to mat it all on before adding it to my pink star dream card base.
I then stamped some butterflys in archival ink and water coloured them with the gelatos. I couldn't decide if I wanted to stamp them with black or coloured archival, so I did both and then chose the black ones :)

I took some white I Am Roses and coloured them with the gelatos to match the flowers in the background. The colours came out much darker on the flowers though lol. I misted them with homemade shimmer mist for some sparkle.
Finally I used a Tattered Banner by Tim Holtz to add my sentiment which was actually part of a journal block and coloured just the part I wanted with Black Soot Distress Marker. I added some Guava Gelato to the edges and smudged it with my finger.
So that's my card for this weeks challenge :) It's Mothers Day in may and so I am going to give this to my mum :) Her colours are red and aqua so I hope she likes this anyway, Haha!
Happy Scrappin'
Purple

Sunday, 9 March 2014

AquaMarker Play Time

Sooooo i got the whole set of AquaMarkers for Christmas :) How lucky am I? I decided to have a play so these are just me exploring the aquamarkers.
 Stampendous Amaryllis
 and Hero Arts Large Flower Background.

So hopefully when I use these on some cards I will have something pretty to show you :) Our DT has been all shook up so my card for that won't post til next week . . . but as a sneak peak . . .
How gorgeous is that stamp . . . I got it free in a mag. OK, so the only reason I got the mag was for the stamp, lol.
Happy Scrappin'
Purple

Sunday, 7 April 2013

A little Sketchy With Cosmo Cricket

I started with this image that I stamped in Archival and coloured with a mix of Inktense and Staedler watercolour pencils. I then chose three patterned papers from the Crate Papers Clementine stack to follow this sketch with. I bought this stack to challenge myself to use papers I wouldn't normally.
For the background layer I chose chevrons, my strip is stripes and instead of a wavy border I chose a piece of paper from the stack that had skinny border like images on it and cut out the one with the flowers and adhered it to the stripy paper. I added a teeny dot of red Liquid Pearls to the middle of each of those flowers.
 Next I chose a red and a green Prima flower and glued them together and onto the card. I added  some perfect pearls to the middle of them too. Then I had a teeny accident and had to add the green flower which made the card unbalanced so I added the red one as well and added liquid pearls to the middle of these too lol. I hand cut the banner and used my Martha Stewart score board to score where wanted the folds to be. I used a triple layer of foam tape in the middle to pop it off the card. The sentiment is from Mpress stamped with Vermillion archival.
Happy Scrappin' 
Purple

I am entering this here:
613 Avenue Create - Anything Goes/With Flowers
Simon Says Stamp And Show - Anything Goes
Make It Monday - Anything Goes 
Challenges 4 Everybody - Anything Goes

Friday, 8 March 2013

Aged Mahogany Ladies With Hats


This is a stamp I have struggled with using, so I decided to see what I could do with it. I used Aged Mahogany Distress Ink to stamp  my card base several times. I then stamped her again on watercolour paper with Jet Black Archival ink.

 
Now I was at my friends house and only had one chunky waterbrush with me so colouring her was fun! I also only had my ink pads with me this day so I used the stamp pad direct to my craft sheet and then spritzed with water to make my watercolour.


Her clothes, hat and lips are all aged mahogany, even the light piece in the middle. Her face is a combination of Spun Sugar and Antique Linen. Darn sorry I can't remember what colour her hair is :( I fussy cut around her (the big brush made a bit of a mess) and die cut her in plain white cs and glued them together with Multi-Medium Matte.


I used the label from the HeroArts/Sizzix Frames With Sprigs set and stamped it with aged mahogany again. I did all my cutting in my trusty Cuttlebug.  I wanted to make this say Happy Mothers Day but I only have one stamp that says that and it is far too big! So I stamped a Fiskars sentiment from the Family stamp set and embossed it with ranger clear superfine. I will use the big stamp I have from Inkadinkado in the middle instead :) I used foam tape to add both to my card base, the image tape is double the height of the one I used for the label.


Three posts in one day. That's what I get for being lazy and not posting over the last three days haha!
Happy Scrappin'
Purple


I am entering this at the following places:
CAS-ual Friday - Stamped Background
One Stop Craft Challenge - Mothers Day
Joyful Stamper -  Anything Goes
Make It Monday - Anything Goes

Saturday, 23 February 2013

My First Sketch Challenge


I used Distress Markers to colour my Image from The Greeting Farm set Later Sk8er. I used Antique Linen, Brushed Corduroy, Tea Dye, Vintage Photo, Peeled Paint, Forest Moss, Tattered Rose, Barn Door, Fired Brick and finally Faded Jeans. I scribbled them on my Ranger Craft Sheet and used the Tim Holtz Waterbrush to paint colour my image. Then I used Distress inks in peeled paint, forest moss, tumbled glass and broken china to create a borer around the card with my ink blending tool. Note to self . . .  Clean the mat before changing colours . . . I have a greenish sky!


I am trying to make this card for a challenge that finishes in a few hours . . . Nothing like a last minute try haha. Having fun trying to pick papers as I went for a boy card and most of my stuff is girly lol. Hmm wonder where my black and white KaiserCraft paper stack is. I could colour some of them to match :) Or leave it plain lol.


I am blogging as I go, can you tell? Lol. And darn it have lost a sentiment stamp amidst my chaos! A Ha! it fell in my tool bag lol. I have used Lifestyle Crafts Nesting Squares to make all my mats for the squares, the rectangles I cut myself. I have been making this card for hours lol. I am using green too, which is not a colour I usually rush to.


I don't have a pair of label dies that were small enough for this project so I paired a Lifestyle Crafts die (top) with a Tim Holtz Sizzix Mover and Shaper Label (bottom). The dies don't match perfectly but they still look good together. They are still a bit larger than I wanted so I am going to use foam tape on the image so I can tuck the labels under it a little.


I worked out where I wanted the sentiment in relation to the image and made a mark with a random marker so I could realign it once I had the double sided tape on.


The stamp set came with a star as well so I am going to add a few stars on two of the corners. All the stamping has been done with Ranger Archival in Jet Black. I used the Tonic Tim Holtz edge distresser on all the dark green mats. The cardstock used is from Bazzil.


This is the first time I have followed a sketch so I have stuck as close as possible for my first time.
Happy Scrappin'
Purple

I am entering this at;
One Stop Craft Challenge - Sketch
Make It Monday - Anything Goes
Inspire Me Fridays - Anything Goes
Crafting By Designs  - Anything Goes
One Stop Craft Challenge - For the Kids

Sunday, 10 February 2013

A Little Experimentation Goes a Long Way

As I said in my previous post I was going to play some more and share the results. I have used stains, watercolour pencils and gelatos and I have a fair few things to share. I am sharing them before I turn them into cards. I think I am getting the hang of the gelatos too :) I have made some very light samples but I can always add more colour if I wish (good thing I have been taking notes on the back of the samples lol).

 Let's start with gelatos. My first attempt was to wet the watercolour paper first, then lay down the colour spritz again and blend with my finger . . . it didn't work very well (might be more to do with the colours I used lol) so I tried again with a brush. That's the sample on the bottom left. Colours used for these samples are Black Licorice, Chocolate and Butterscotch.


For the top sample I applied dry and spritzed three puddles of water on my mat. I started at black and worked to lightest blending with a paintbrush. I added a little too much water in some places so I used a wet brush directly to the gelato I needed to fix the problem . I had so much colour left on my mat that I got sick of wasting it and started using the lefovers on leftover scraps of watercolour paper. That's the image on the bottom right.

The next set were all made when I applied gelatos to a wet surface and blended with a paintbrush for the first gen (top pic). These colours seemed to go on very thick and allowed me to make the original plus two more samples. Colours are Blueberry, Boysenberry and Grape. The second gen, to the right, was made swiping the colours straight off the craft mat and third gen I sprizted the leftovers then applied them to the cs for the third gen pale look on the bottom.


The following two were made at the same time. I applied gelato to my ranger craft mat and spritzed with water to make a light wash. These have only one coat but If I had wanted darker colours I could have just made one and dried in between layers to darken the colours. I used the metallics in Melon, Grape and Mint.


Next up we have a couple done with distress stains. I used three colours for each, spritzed with water and blended them with my finger. When I blend using my finger I tend to work from lightest to darkest then flip and work from lightest to darkest to work the colours into each other and smooth them out. The top one uses Peacock Feathers, Evergreen Bough and Bundled Sage and has been flicked with water to get the cool droplet effect. The bottom one uses Aged Mahogany, Fired Brick and Worn Lipstick.


I only have two Tattered Angels Glimmer Mists and for ome reason one of mine looked nowhere near the colour on the back :( It was supposed to be a really pretty pink but instead there was barely any colour there at all lol. The colour was supposed to be pink bubblegum. I added 20 drops of picked raspberry reinker and a spritz of Dylusions in Postbox Red. I ended up with a colour a bit darker than the colour I was supposed to have but very pretty none the less :)


I used a paintbrush dipped in the bottle and started painting each colour on from their respective ends and blended with my finger in the middle. The yellow is Lemon Zest.

Onto Derwent Watercolour pencils. Each sample uses the same set of colours applied directly to dry paper. The colours are 2, 7, 8, 10 and 12. I spritzed the top one with water then used my finger to blend the colours. I could have added more red but liked the washed out effect and decided to lave it as. The bottom one was blended with the Tim Holtz Waterbrush.


The top picture uses the colours 40, 43, 44, 45, 46 and 47. I used a waterbrush and pulled colour directly from the pencils. I really like this technique. The middle pic uses 18, 21, 22, 24 and 25. I coloured right on the paper for this one and blended with a waterbrush. I spilled a  drop of the mist I mixed onto this one so I decided to make the best of it and used  the spray tube from the bottle to add some drips and lines, sprized again and rand some paper towel over the top to get that faded look.


The bottom pic uses 37, 38, 39, 40 and 44 coloured directly yo the paper. Not sure why I added this pic in the bunch because I cannot remember how I did it lmao.

This next pic uses inktense pencils. I used 1200, 1300 and 1400 straight from the pencil with the waterbrush for the top image and for the bottom one I used the pencils coloured right onto a tag and blended with the waterbrush. As you can see it is very streaky compared o others so water colour paper is definitely best.


I realised as I was typing this that i forgot to do a sample using the waterbrush from the gelato then onto the paper but anyways I am sure you get the idea. Hope this helps you in some way.
Happy Scrappin'
Purple