So I was looking into getting alcohol markers . I bought some Promarkers and I really liked them so I bought another set (vivid and set 1) . The only problem was I didn't have many blendable colours . Then I bought a set of 30 old Trias someone was selling. This gave me a few pastel colours and some skin colours and also 30 fine nibs that also work on the Promarkers . I really love the streakless colouring. I have faber castells and could never get them to not streak so don't know what I was doing wrong! Anyway to cut this long story short I frequent ebay quite a bit and came across a seller in France who was selling a complete set of Ciaos and Wides with a couple of sketches thrown in. They are barely used (they said they did 2 pictures) and still nice and juicy. So with my heart in my chest and waiting til the last minute to bid I nabbed them for less than 1/3 of the rrp :) Bargain lol. Then for my birthday a friend bought me the case for them :) All my copics and promarkers fit in it nicely at this stage although I am not sure if I will keep all the wides. Will see how I feel a bit down the track.

Anyway now that I am finished rambling about that I get to tell you that this weeks project for
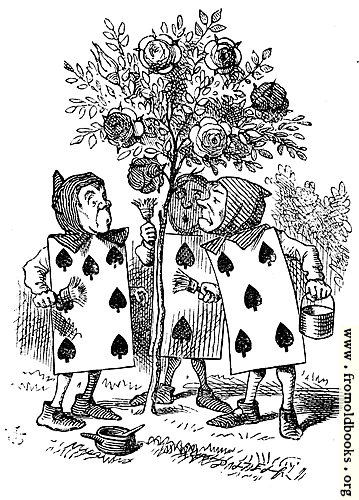
Eclectic Ellapu needs to contain playing cards :). So I scoured the net for an image I could use. I fell in love with one but thought $4 might be a lil much for a digi when you can get rubber for that price. So I kept looking. Originally I thought maybe I would do the Queen of Hearts from Alice in Wonderland but then I found some
Free images at
From Old Books. That links takes you directly to the page with the image I used but there are many many more :)
So now I have coloured this with a combination of copics and promarkers and am using an Xcut Ornate Frame die to cut it out in my Ebosser. Here is a list of colours I have used:
Roses, paintbrushes and Card 2; R27, R29, E40, E41
Card 5; R59, RV69
Card 7; Promarkers Olive and Pear Green
Stockings; E35, E33
Faces; E00, E01, E02, E93 (cheeks)
Tree; G99, G95, YG95
Grass and bush; YG63 YG67, Olive Green, G94, G28, YG91
Shadows on all cards; C5, C2, C0
Paint pots; C5, C3, Y21
Next I grabbed Cosmo Crickets 6" Odds & Ends stack. I grabbed two co-ordinating pieces. The green stripey piece, the coloured image and the piece for iside the card were all cut using Xcuts Ornate Frames. I edged them with R29.
For the cream floral piece I used a Martha Stewart corner punch and my B000 for the edges. Argh my kitty is trying to help me type lol.
Next up I grabbed my Tim Holtz Tattered Banners Sizzix die to cut two banners the same size. I used white cs which I coloured with R29 to match the rest of the card. The sentiments were printed out at the same time as the images. I cut around them then coloured them with B000, there was still some R29 on my fingers and it came off on the first one I coloured so I decided I best put some on the other one as well so they matched :). I added two layers of foam tape behind the middle of each banner after I taped the sentiments on.
For my base I used cream cs that I edged with R29 again. I used double sided tape to add my Cosmo Cricket papers and then a single layer of foam tape on my image. I then added the banners. I was in two minds as to whether or not to add flowers or not. But as you can see I have left it for now :)
Below are a couple of images I have coloured with my copics since I got them.
Not very good at hair yet that's why she isn't finished. I attempted hair on the second one as you can see :) also a mouth... Shoulda left it but live n learn hey?
The second picture here shows three different card stocks. Neenah Solar White and two I got from officeworks here in Australia. I have to say the cheaper two cardstocks performed way better than I thought they would. When I pull some more paper for my cupboard I will do a post on it and let you know the names of the brands :).
Thanks for Stopping by.
Happy Scrappin'
Purple
I am entering this at;
Simon Says Stamp - Die Cuts