blinkie

CraftyCrafter

Thursday 28 February 2013

Hero Arts Watercolor Petals Card


I decided to try another sketch challenge. This one is from Moving Along With The Times. I also wanted to do an entry for Simon Says using a stamp set that you love that hasn't been used in a while or never used. (mine was never used even though I have owned it for a while). Here is the sketch.

 
Sorry about the big gap but that's how the pic uploads lol. The stamp set is Hero Arts Watercolour Petals. I used the metallic Gelatos directly onto the stamp and then spritzed with water and stamped onto Cre8tiv 180gsm watercolour paper. Even though you can't see it the stamping is very shimmery.


I also thought why not add it to another challenge and add some silver. So with some lifestyle crafts dies I set to work. The image is cut with Nesting Ovals and mounted on silver star dream (shimmery) paper cut with the Nesting Oval Doilies die. The corners are from the corners and borders set and is the smaller one.


I found some random papers in my stash for the rest of the sketch pieces. Had trouble finding anything in colours I liked lol. I also stamped this in pink to try my hand at another card :)
Happy Scrappin'
Purple

I am entering this at:
Moving Along With The Times - Going Sketchy
CAS-ual Friday - Add Silver
Simon Says Stamp - Stamps You Love But Don't Use
Crafty Cardmakers - Blooming Images

Wednesday 27 February 2013

Maya Road Around The World Paint Splatter Cards


The backgrounds for these cards were made using a technique a friend of mine saw in a magazine. Basically you load a toothbrush with paint and run your finger over the paintbrush to get little speckles of paint all over your paper, three or four shades of the same colour work well. Let me tell you it makes a huuuuuge mess lol . . . Best course of action is to make a bunch all at once. That way you have them ready to go as needed. It's supposed to look like whatever that stone they use to make kitchen benches is lol . . .


After the paint has dried, lay a mask over the top of your piece (for this series of cards I used Tattered Angels Tattered Traveler compass) and use Versamark, Perfect Medium etc over the whole piece of cardstock. Remove the mask and then use clear embossing powder over the card. Once that has cooled swipe a white ink pad (non permanent) over the previously masked places for extra contrast.


I have used Maya Roads All Around the world stamp set for the first two cards. Tim Holtz's Sizzix Cogs die on the last card and some Stampers Anonymous stamps. The middle card has a sentiment from Stampin' Up. The sentiments on the last two cards are die cut from Lifestyle Crafts Dies. Any q's feel free to ask in the comments :)
Happy Scrappin'
Purple

I am entering this at:
Make it Monday - Anything Goes 
Ecclectic Ellapu - Masculine
Challenges 4 Everyone - Anything Goes

Sunday 24 February 2013

Gel Medium + Glitter + Distress Stains = A Lot Of Fun!


Warning: Very Messy!


 I have a few techniques I want to try with Gel Medium. So I bought some Liquitex Gel Medium (my local spotlight just started carrying Liquitex!) and my first technique was with glitter. My friend walked into a thrift shop here and found a bunch of glossy photo paper someone had gotten rid of. I don't know why but I decided it would be perfect to try this on lol.


I taped the photo paper to my craft sheet with repositional tape and then taped the stencil in place with florist tape. I used a 12" Crafter's Workshop Daisy Cluster stencil used a blob of the gel medium. You can spread it with a craft trowel, an old credit card or any other scraper type thing you have. Make sure you get in all the small spaces and then remove stencil carefully and clean immediately with water., otherwise the gel stays there forever, then I sprinkled glitter all over the gel and set it aside to dry.


For the sentiment I used a KaiserCraft stencil I had gotten a long time ago called party time. This time I used regular card stock and repeated the steps above after die cutting a Lifestyle Crafts Nesting Oval to fit over the words.


 On another piece of photo paper I grabbed a bunch of colours of distress stains (from the new 12) and splattered them on the paper. I then used the movers and shapers butterflies as well as an ittty bitty Lifestyle Crafts Nesting Butterfly to die cut the splatter paper (I tried using normal paper but it was too washed out compared to the vibrant photo paper).


When the gel medium is dry I used a paintbrush to remove the excess glitter (if you don't do this your stains end up caked with glitter! (you will still have some but not as much as if you use the brush). At this point you have to work quickly because the photo paper absorbs the colour really fast so if you want the colours to blend a bit I recommend starting in one spot and doing adjacent gaps. I used distress stains to add the colour by gently dabbing over the area I wanted a particular colour.  Once I had coloured it all I began to dry it. It looks like a mess but once dry you can dampen some paper towel and remove the excess stain from the glitter.


I used a plain white cs base to best show off the colours and adhered the flowered photo paper with double sided tape. The butterflies are glued down with glossy accents and the oval with a combo of foam tape and glossy to help it adhere to the glitter. I  have to say the colours are even more vibrant in real life lol. Hard to get accurate pictures of it with all the sparkling! What little girl wouldn't love this :)
Happy Scrappin'
Purple

I am entering this at:
Crafting By Designs - Anything Goes
Love to Create Challenge - All That Glitters
One Stop Craft Challenge - For The Kids
Inspire Me Fridays - Anything Goes
Make It Monday - Anything Goes

Getting Into This Challenge Thing!


I have a few challenges I am interested in doing at the moment so I am actively going to combine a few. One is two squares, a circle, a sentiment and ribbon, another is ribbon and buttons (lets see of I can pull that off) and another is embossing on embossing type of thing.

First up I have coloured a chipboard frame in Magenta Hue Archival and its inner piece in French Ultramarine Archival. I then covered them in Perfect Medium and UTEE. I heated them up and while still hot tossed more utee on top to give three layers in total and a nice smooth surface.Then I took Versamark and inked up some stamps from Stampendous called Butterfly Beauties and with the inner piece replaced in the frame I stamped across both pieces. I used Hampton Arts embossing powder from the pastel pack in plain pink and blue.


I chose three co-ordinating papers from the DCWV French Country stack. With my Ecraft I cut a doily svg that I got for free from somewhere. Unfortunately I have lost the link back to the website :( With my bug and a Lifestyle Craft Nesting Rounded Squares I cut the 2nd biggest one from a different paper.


With the third paper I cut small pieces to go behind some tearing I did on the square piece. I ripped two small lines on opposite sides of the paper and used a water brush to soften the paper in that area to make it easier to bend back. I then used another co-ordinating paper behind the tears.


Buttons buttons . . . I have  a couple hundred but do you think I can find some to match what I have lol. Maybe I should have started with buttons lol. Anyway I found one and here it is in situ lol.


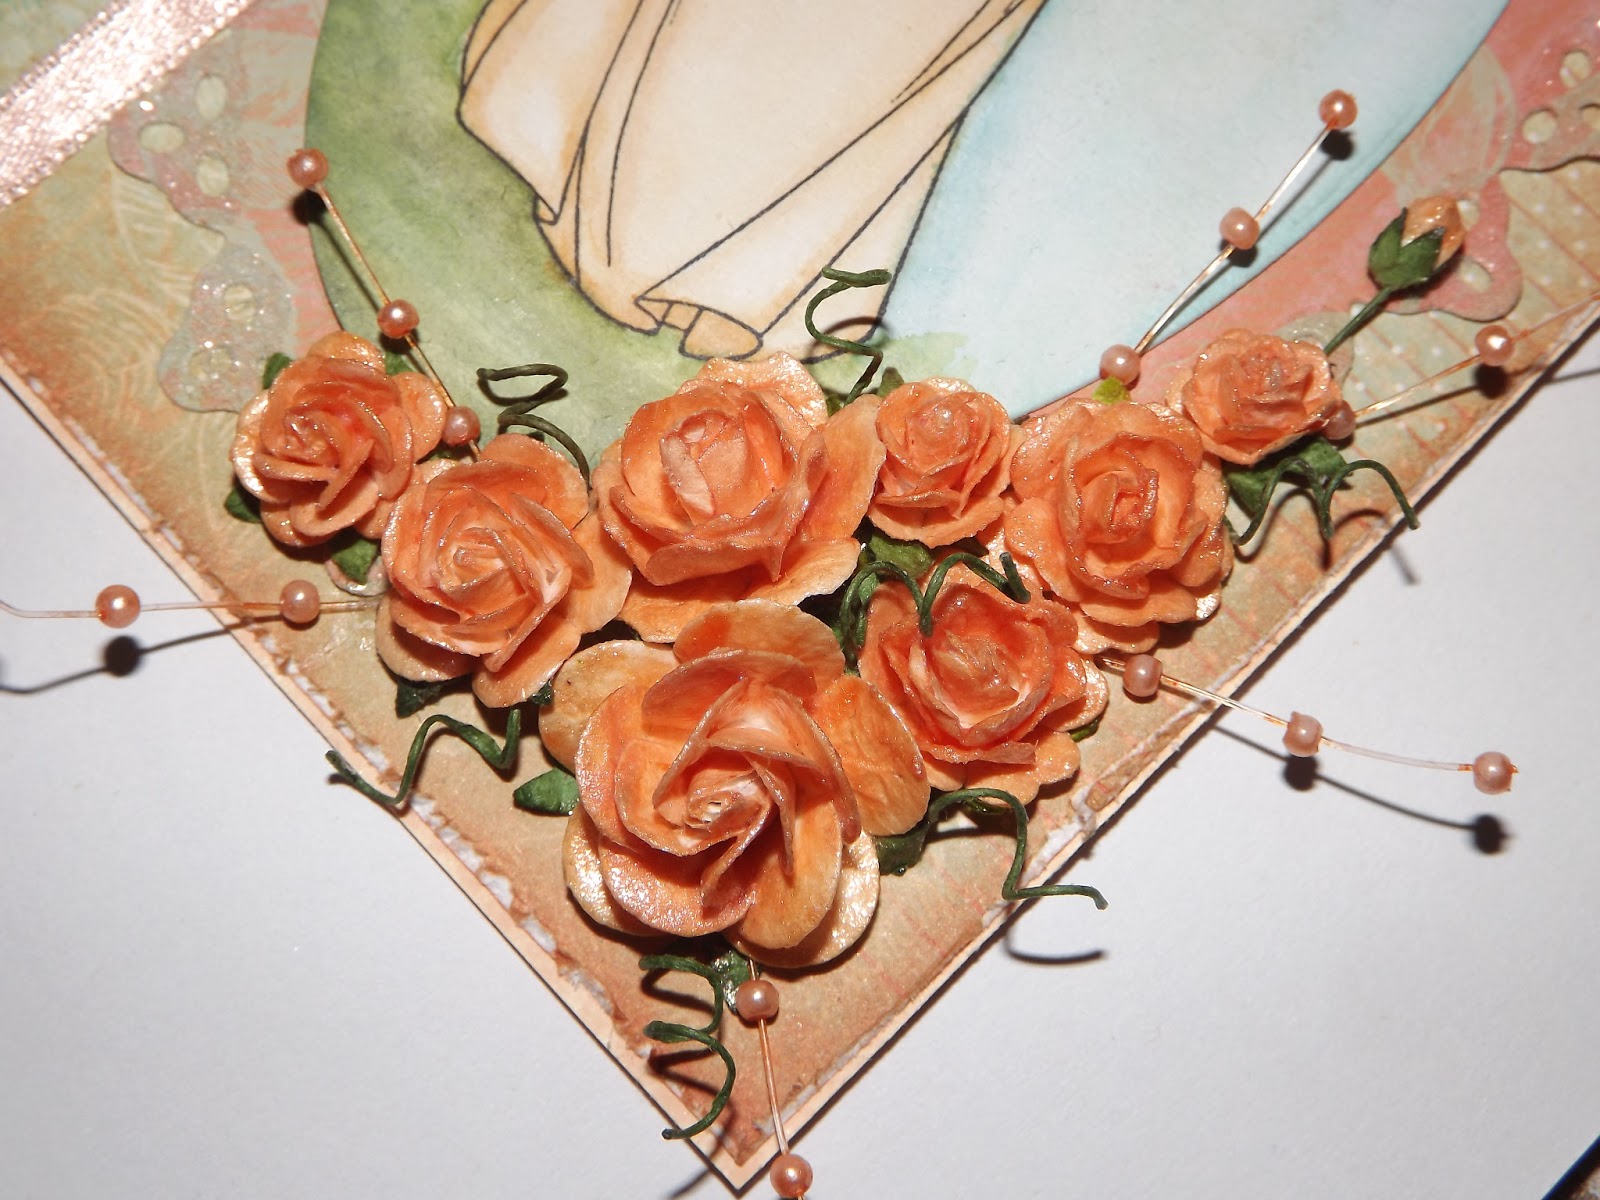
I made a flower by gluing the dcwv papers to grungepaper and cutting the second biggest flower from Tim Holtz' Tattered Florals Sizzix die. In hindsight I should have just used the papers as they are quit thick on their own. I then used one whole flower, one with one petal removed and one with two removed. I used the two petals off the last flower to make the centre. I was going to use a button but it just wouldn't work lol. I edged the flower petals with tumbled glass and warn lipstick using the ink blending tool to get a softer look.


Now I am on the hunt for ribbon and a cute tag as well as a sentiment. Getting close to the wire now lol. Challenge ends in 3.5hrs. Gettin sleepy but I will win!!! I found a tag I got from SVG Cuts and used some scraps from the card to cut the two layers in my ecraft and then inked their edges. I used some ribbon from Martha Stewart in the top layers hole. I am going to adhere them together with foam tape so the base sits under my chipboard frame.


Next the fun bit, working out where everything goes lol. I used triple foam tape behind the centre square of my frame and glossy on the ribbons, button and flower. Double sided tape for everything else.
Happy Scrappin'
Purple

I am entering this at:
Make My Monday - Ribbons and Buttons
Technique Time Tuesday - Embedded Image
Trimmies Craft Challenge Blog - Two squares, a circle, a sentiment and ribbon
Inspire Me Fridays - Anything Goes
Crafting By Design - Anything Goes
Simply Create Too -  Mothers Day/Female

Saturday 23 February 2013

My First Sketch Challenge


I used Distress Markers to colour my Image from The Greeting Farm set Later Sk8er. I used Antique Linen, Brushed Corduroy, Tea Dye, Vintage Photo, Peeled Paint, Forest Moss, Tattered Rose, Barn Door, Fired Brick and finally Faded Jeans. I scribbled them on my Ranger Craft Sheet and used the Tim Holtz Waterbrush to paint colour my image. Then I used Distress inks in peeled paint, forest moss, tumbled glass and broken china to create a borer around the card with my ink blending tool. Note to self . . .  Clean the mat before changing colours . . . I have a greenish sky!


I am trying to make this card for a challenge that finishes in a few hours . . . Nothing like a last minute try haha. Having fun trying to pick papers as I went for a boy card and most of my stuff is girly lol. Hmm wonder where my black and white KaiserCraft paper stack is. I could colour some of them to match :) Or leave it plain lol.


I am blogging as I go, can you tell? Lol. And darn it have lost a sentiment stamp amidst my chaos! A Ha! it fell in my tool bag lol. I have used Lifestyle Crafts Nesting Squares to make all my mats for the squares, the rectangles I cut myself. I have been making this card for hours lol. I am using green too, which is not a colour I usually rush to.


I don't have a pair of label dies that were small enough for this project so I paired a Lifestyle Crafts die (top) with a Tim Holtz Sizzix Mover and Shaper Label (bottom). The dies don't match perfectly but they still look good together. They are still a bit larger than I wanted so I am going to use foam tape on the image so I can tuck the labels under it a little.


I worked out where I wanted the sentiment in relation to the image and made a mark with a random marker so I could realign it once I had the double sided tape on.


The stamp set came with a star as well so I am going to add a few stars on two of the corners. All the stamping has been done with Ranger Archival in Jet Black. I used the Tonic Tim Holtz edge distresser on all the dark green mats. The cardstock used is from Bazzil.


This is the first time I have followed a sketch so I have stuck as close as possible for my first time.
Happy Scrappin'
Purple

I am entering this at;
One Stop Craft Challenge - Sketch
Make It Monday - Anything Goes
Inspire Me Fridays - Anything Goes
Crafting By Designs  - Anything Goes
One Stop Craft Challenge - For the Kids

Wednesday 20 February 2013

Simon Says White On White


I decided to try my hand at this challenge on the Simon Says Blog. It's not as easy as it sounds and my card so did not come out as I had envisioned it lol . . . I wanted it to have pretty 3d butterflies and things for example lol.

I grabbed some different cardstocks to use and set to work. I used plain white as my base (9" x 4.5"), I then cut a 4.5" frame using my ecraft out of pearl cs and put the frame aside for another time and used the middle bit lol. Next I used a Lifestyle Crafts Doily Die to cut a doily out of white glitter cs from an American Crafts Christmas Glitter stack. I then used the pearl again to cut a Nesting Circle Doily, followed by an acetate Nesting Circle. I also cut four butterfly corners for the Corners It Kit.


I adhered the first pearl cs to my square base with tape and then glued the butterfly corners down with Matte Multi Medium. I then glued the doily on. Onto my acetate circle I stamped a Fiskars Wishes All Around Best Wishes stamp (had to do it a few times as I kept lining in up wrong ;) lol). I then hid some foam squares I had cut in half under the stamped scallops and adhered it to my small nesting lace doily. I used more foam tape and adhered it to my card and it was done.


That didn't stop me from trying to add some butterflies though lol . . .  They just wouldn't work for me :(. I have some leftover pieces from this card so maybe I will try again but add a different shape for the greeting. I do love the shadow the greeting gives onto the white though :)
Happy Scrappin'
Purple

I am entering this at:
Simon Says Stamp - White on White
Make It Monday - Anything Goes
Inspire Me Fridays - Anything Goes 
Love To Create - All That Glitters
Challenges 4 Everybody - Anything Goes

Sunday 17 February 2013

Valentines For My Boyfriend


So I wanted to make a card using svg's from a lovely lady who makes and distributes free ones. But I couldn't find the cord for my Ecraft :( So I had to think on the fly . . .

What I came up with was a pretty simple card to make and for a change I used another square base :) I started by cutting the red Heart Doily die from Lifestyle Crafts, then cut a 24cm x 12cm piece of white cs for the base. I then cut a piece of Grungeboard using the Sizzix Locket Heart die and used a keyhole mover and shaper in the centre, I then covered it with Picket Fence Distress Crackle Paint.


I glued the heart down with tiny dots of Glossy Accents and then started working out what embellishments I wanted to use. I picked a set of wings from Regal Adornments and a key from Locket Keys and glued these on with more glossy. I used foam tape to lift the heart and allow the wings to slide under :)


I used a stamp from The Paper Company's Our Wedding set and stamped it in vermillion Archival. I stamped the inside with the John Keats Quote "Two souls with but a single thought, two hearts that beat as one." from the Fiskars Just Married Quotes stamp set.


A nice easy card that didn't take me hours to make and that the recipient thought looked good :)
Hope you had a great Valentine's day!
Happy Scrappin'
Purple

I am entering this at;

Joyful Stamper - Inspire Me Fridays
Make It Monday - Anything Goes
Challenges 4 Everybody - Anything Goes

Friday 15 February 2013

Valentine For My Daughter


I made a quick Valentines card for my youngest daughter today. I worry that she feels left out as I was pretty sure her older sister would get a valentine (she came home with a red rose clutched in her hand), and my BF got me a card and some choccies and woohoo I am getting the Tim Holtz Cargo Case off him as well :) and I wanted her to have a special day too . . .

So while my BF picked her up from school and bought her a coke slushee and some chips and then took her to the park I set to creating a quick card just for her. I grabbed a Lifestyle Crafts Nesting Eyelet Heart die and a Nesting Heart die and cut me some hearts :) I measured the largest heart I used and cut a square card slightly bigger than the die from hot pink cs (her fave colour).

I used some Hero Arts white embossing powder with some stamps from The Paper Studio then grabbed some I am Roses flowers. I coloured the edges of the flowers with Picked Raspberry Distress Stain and then spritzed with my home made mist (about halfway down for a how to). I used the stain on the tips of the flowers again to make them darker. Not happy the colours don't match to well but was rushing before she arrived home lol (not like she notices these things :)).


How awesome is this pic? I just discovered the super macro feature on my camera lol. The hearts are double sided taped together and then I used foam tape to adhere them for some dimension. The flowers are adhered with glossy accents :)


Then I used my ecraft to cut a whole heap of red hearts in different sizes. I stuck them all around the room including decorating the television. LM noticed them as soon as she walked in the room and thought they were brilliant :), she has appropriated them for her own room now lol.


Her little face when I gave her the card was overjoyed :). So worthwhile knocking up a quick card to see that look plus I got a great big hug! Doesn't get better than that :) Just goes to show that Valentines Day can be for everyone no matter how big or small :)
Happy Scrappin'
Purple

I am entering this here;
Joyful Stamper - Inspire Me Fridays
Make It Monday - Anything Goes

Thursday 14 February 2013

Willow Holding Baby Card


I was given a paper stack for christmas with quite a few papers I am going to find challenging to use. Some are quite bright lol.  It's by Kaisercraft and is called Antique Rose. I had taken a particularly bright orange piece and attacked it with some Picket Fence Distress Stain and quite liked the results so decided to use it to make a card.


I was looking around for some ideas and  my eyes set upon a stamp I got when I was at a craft show in 2012. The stamp is from Whiff of Joy called Willow Holding Baby. I had never heard of the stamp company before but I fell in love with the stamp :). Good thing it was 50% off haha.


I stamped her onto watercolour paper and outlined her with distress markers, main colours used are Dried Marigold and Spiced Marmalade for her dress, Broken China for the baby blanket and a mix of Frayed Burlap and Tattered Rose for the skin with a hint of watered down Barn Door for the cheeks.  Using my Tim Holtz waterbrush I wet the outlines and moved the colours about. I dried the image and reapplied colours as needed. I scribbled a random mix of greens around her feet and mixed them with the waterbrush for grass. I then outlined around the rest of the image with tumbled glass and pulled the colour outwards. I cut the image with a Lifestyle Crafts Nesting Oval and then used my ink blending tool with Bundled Sage and Tumbled Glass around the edges.


To mount this on I cut the largest Nesting Oval Doily from Lifestyle Crafts out of the paper I had previously used Picket Fence Distress Stain on. I then used a Franchville Glue Pen around the holes of the oval doily and sprinkled Rock Candy Distress Stickles Dry Glitter over this.


I adhered the coloured image to this and then selected another sheet of paper from the Antique Rose stack to mount this on. I cut the sheet the same side as my card and then used the Tonic edge distresser to distress the edges. I found some matching ribbon for one side of the card and used double sided tape to adhere it. Then the fun began haha.

I got a bunch of I am Roses from my stash and coloured them with some home made glimmer glaze (recipe for this one was Reeves Iridescent Medium, Multi Medium Glossy, a spritz of water and Dried Marigold Reinker til desired colour is reached). I had fun working out how to do this cluster as I haven't had much practice so whenever I try it it takes me hours or in this case days lol. I coloured some pearl spray with an equal mix of Salmon and Peach Bellini in a snap lock bag and made some twizzles with the stems of the flowers. I glued them all on with Glossy Accents.


And there you have it. I had most of it done quick and easy. It was just the flowers that almost beat me but I won in the end lol. One thing I did learn was to colour a small section at a time to add water too as it's harder to blend once it dries. So in love with this stamp. I could colour her over and over! lol


Happy Scrappin'
Purple
Moving Along With The Times - Only Girls Aloud
Make It Monday - Anything Goes
Eclectic Ellapu - Girly
The Joyful Stamper - Inspire Me Fridays

Tuesday 12 February 2013

Something Messy/Grungy


I wanted to make a card for the Simon Says Stamp something messy challenge. I always get messy crafting no mater what I make so I could just about enter anything lmao however in keeping with the spirit of things I decided to work in browns with gelatos and a lil distress thrown in to grungify and mess everything up a bit . . .

For the background I started by stamping the blueprint type stamp from Tim Holtz' Stampers Anonymous Steampunk stamp set using Picket Fence Distress Stain on a manilla tag. I then used gelatos in Gold, Butterscotch and Chocolate randomly on the tag and blending with a paintbrush and my finger. I did this for a couple of layers to build up the colour I wanted. I then used Black Archival ink to stamp the blueprint image again.


As you can see my stamping wasn't the straightest lmao. Messy stamping? I then trimmed the tag and used some Vintage Photo and my blending tool around the edges. Next I cut some Movers and Shapers Cogs from Grungepaper and Kaisercraft Timeless Classics papers from the 12" stack. I used a different colour gelato on each paper cog and blended with a lil water and my finger and glued them to the grungepaper cogs with Glossy Accents (next time I will glue then cut silly me lol).


Then from more manilla I made a small rectangle big enough to fit my saying and used my three gelatos to colour it and then edged it in Vintage Photo. I stamped my sentiment from the Urban Classics Tim Holtz set in Archival Black. I distressed the edges of both the background and sentiment using Tim's Tonic Edge Distresser. I chose some embellishments from Tims Cogs and Muse Token ranges to finish of the card. The sentiment and largest cog are adhered with foam tape, the rest of the cogs with glossy accents and the muse token has two jump rings from a pack of Facets to attach it to the saying.


The first pic of the card I took was without flash the next one is with flash. The cards colours are somewhere in between the tw, but the flash version allows you to see all the details properly.

Not 100% sure of this card so I will most likely try another "messy" card in the next couple of days.
Happy Scrappin'
Purple

I am entering this at;
Simon Says Stamp - Messy
Make It Monday - Anything Goes
Make My Monday -  Add A Charm
The Joyful Stamper - Inspire Me Fridays

Monday 11 February 2013

Another Valentines Day Card :)


I decided to create this card with two challenges in mind. A sketch at Freshly Made Sketches and a challenge at Simon Says Stamp.
I used a kit I got from the last craft show I went to in Sydney from My Mind's Eye called Sate of the Heart by Jen Wilson. The papers I used are called Full of Love and Sweet Nothings as well as a heart and border strip from a matching sheet of die cuts.

I used a Lifestyle Crafts Nesting Hearts Die to create an inner piece for the heart die cut and stamped it with a Sweet Sentiments stamp from Basic Grey in Fired Brick Distress Ink. I then used some foam squares to adhere the heart and heart die cut together and then to adhere them to the card.


This is my first time entering a sketch challenge so we shall see how it goes lol. Using papers and die cuts from the same kit sure speeded up the process too. One of the quickest cards I have made lately lol. I spent hours working on flower placement for a card earlier today haha...


Happy Scrappin'
Purple

I am entering this on;
Freshly Made Sketches
Simon Says Stamp - Have a Heart
Joyful Stamper - Inspire Me Fridays
Make It Monday - Anything Goes
Crafty Card Makers - Vintage Love
Pink Elephant - Love is in the Air