I go to my friends house on a tuesday to do some creating, this week I was hoping my simon order would be here so I could take my new stash to play with... Alas it didn't arrive in time, so I chucked a bunch of random stuff in my trolley and off I went.
The random stuff included Distress Stains, Faber Castell Big Brush and Artist Markers, Distress Ink Pads, a bunch of stamps, whhite cardstock and a few things I wanted to use to make cards with.
My list of products I wanted to use were
- Backgrounds made during Creative Chemistry 101 (I have a container full)
- Washi or Tissue Tape
- Stickers I bought from Lincraft in Sydney
- A flower I made using the bleeding technique
- My new Cuttlebug Cut and Emboss Folder
- White Embossing Powder
I managed to use 5/6 in the time I had :) So considering I hadn't created much lately I was pretty happy with that. I made three cards, none of which have their sentiments yet as I haven't decided what to use lol...
Card one is made using a background from Creative Chem, a rocket ship from the Hot Rockets stampendous stamp set, pit artist pens, stazon, distress stains and the cut and emboss labels folder from cuttlebug.
I used a background from class and ran it through my bug with the ornamental Tim Holtz die and mounted it on a white card base. I ran some more white cs through the cuttlebug inside the labels die. While the cs was still in the die I flipped it over and inked the embossed areas with a makeup sponge to get the nice intense colours. The rocket is stamped with black stazon and coloured with pitt artist markers and bb markers and then fussy cut. Both the rocket and the label are adhered with foam tape to add dimension.
I am thinking a Ribbon banner or two to add the sentiments and finish off my card :)
Card two uses another background from Creative Chem, symphony tissue tape, distress inks and a mini movers and shapers label die.
I coloured the symphony tissue tape with seedless preserves and then adhered it to the edges of my background. I took a flower I had coloured with seedless preserves and stuck it down with glossy accents. I am debating adding some brown leaves to the flower... I cut a label with the mini movers and shapers and inked the edges with my distress tool and more seedless.
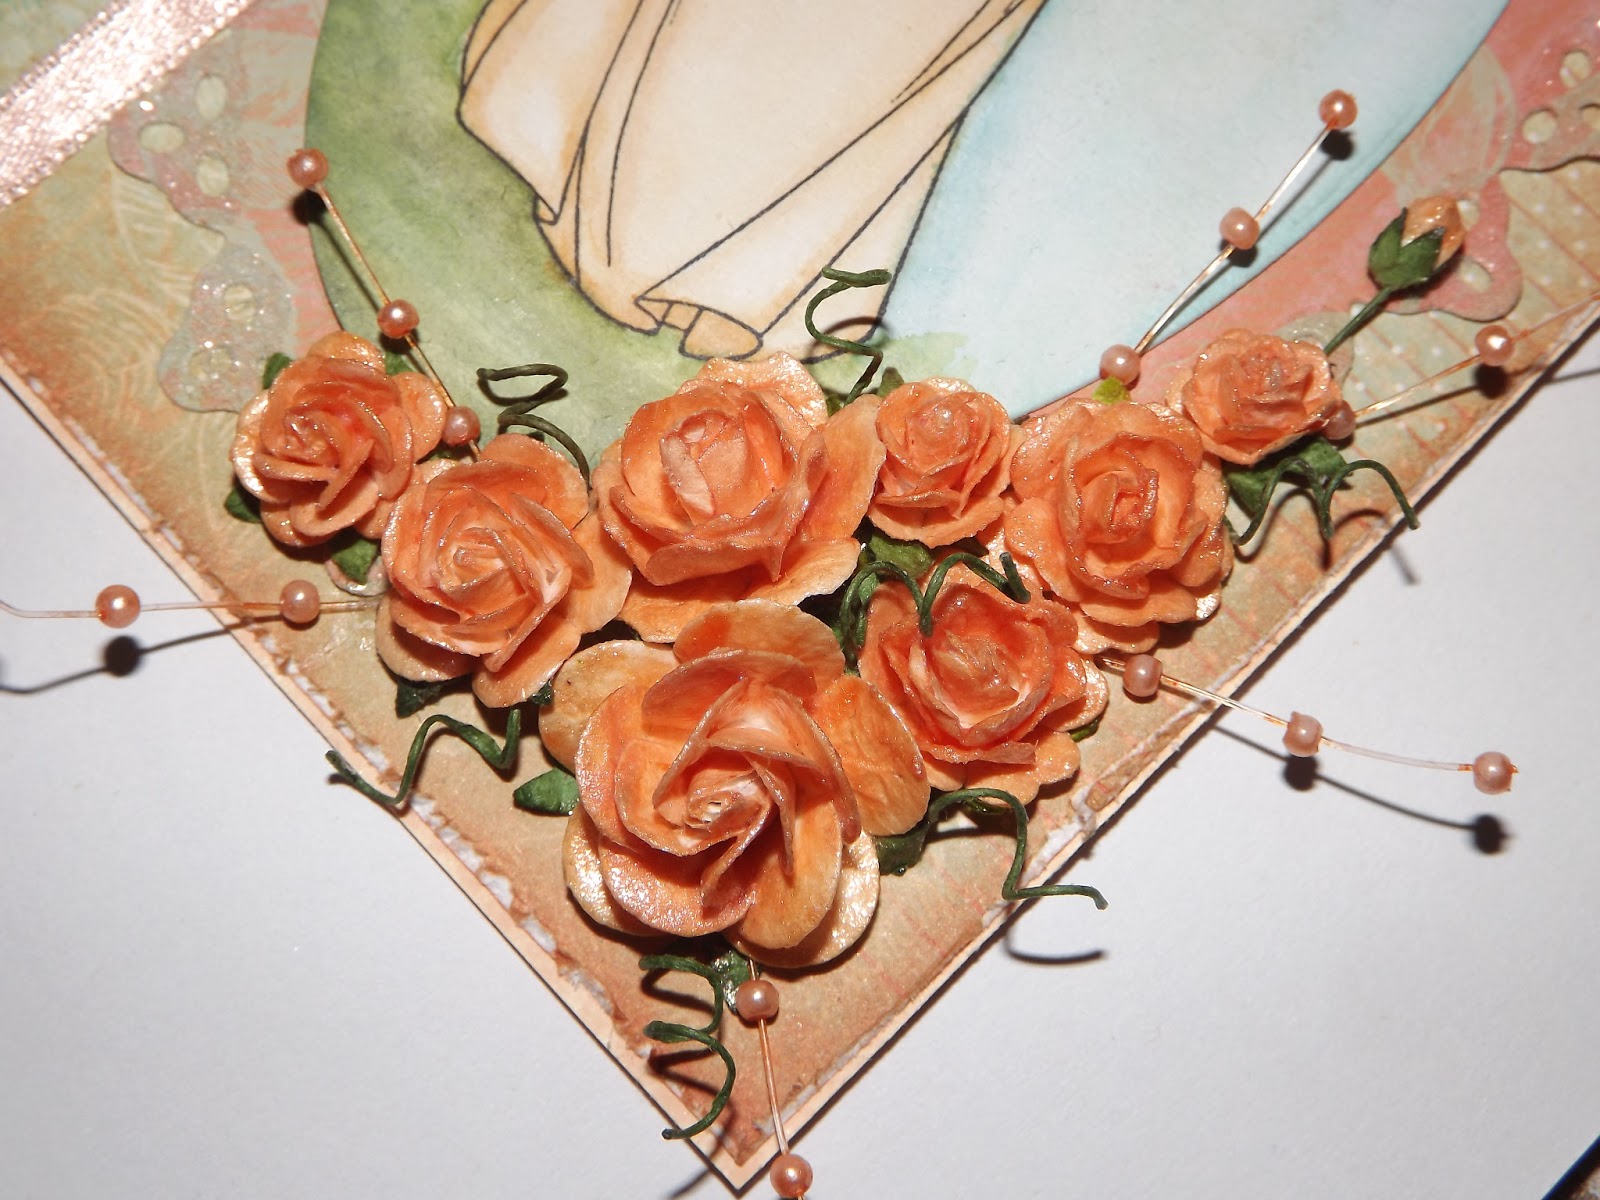
The last one is my favourite of the three I think and uses another creative Chem background, yay 3 for 3... lol. I used Vellum, a sticker,
I am Roses, and pitt artist pens.
I cut a plain piece of vellum with the ornamental die and adhered my outline sticker to the middle. I used my artist markers to colour the image in and a tissue to remove the ink from the sticker. I then stamped flourishes around the edges with the same blue marker I used in the image. I coloured some roses with the same two colours I used in the flower images and sprayed them with shimmer spray to add some sparkle. I glued the flowers down with glossy and added some twizzles.
There is a smidge of tape showing in the top left corner but thats where I will adhere my sentiment to hide it...
So while I didn't power create I did manage to make three nice cards :) and guess what!!!! My order came on Wednesday. I got a lil of this and a lil of that to add to my collection, a few stickles, a couple of distress pads I didn't have and some paints etc. But the thing I was most excited about was my Valentines day present!!! Finally I have the complete set of Gelatos in my hot little hand... Guess you know what my next blog post will be about!
Happy Scrappin'
Purple